
VR Control Basics
First time jumping into edify, or maybe want to see what functionality you might be missing? This article will walk you through the basic controls for each platform when navigating edify.
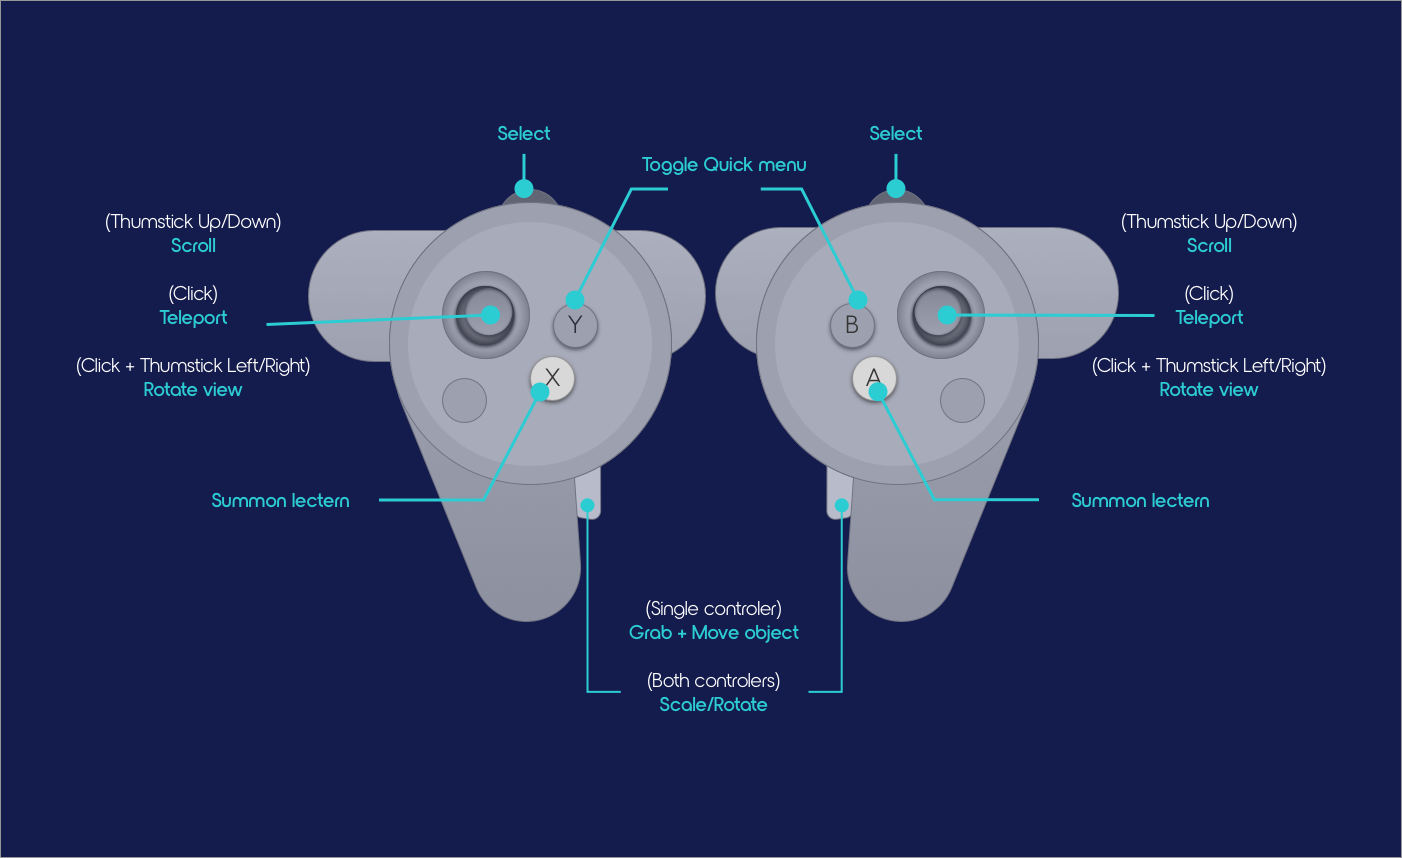
Oculus Quest
- Trigger: This will be under your index finger. The button is used to press virtual buttons, and select/interact with objects within the VR environment.
- Grip: These will be under your middle / ring fingers on both controllers. They are used to grab, move, rotate and resize objects.
- Thumb Buttons: These have two on each side: left has Y and X (top and bottom), right has B and A (top and bottom). Only the two bottoms, X and A, are currently used. These open the toolkit menu on their respective controllers.
- Analog stick: This will be under your thumb. Pressing the middle will enable you to teleport. Moving to the left and right and pressing in will rotate you in those directions. Up, down, left and right will also take on different functions depending on the scenario, which the controller will guide you with.
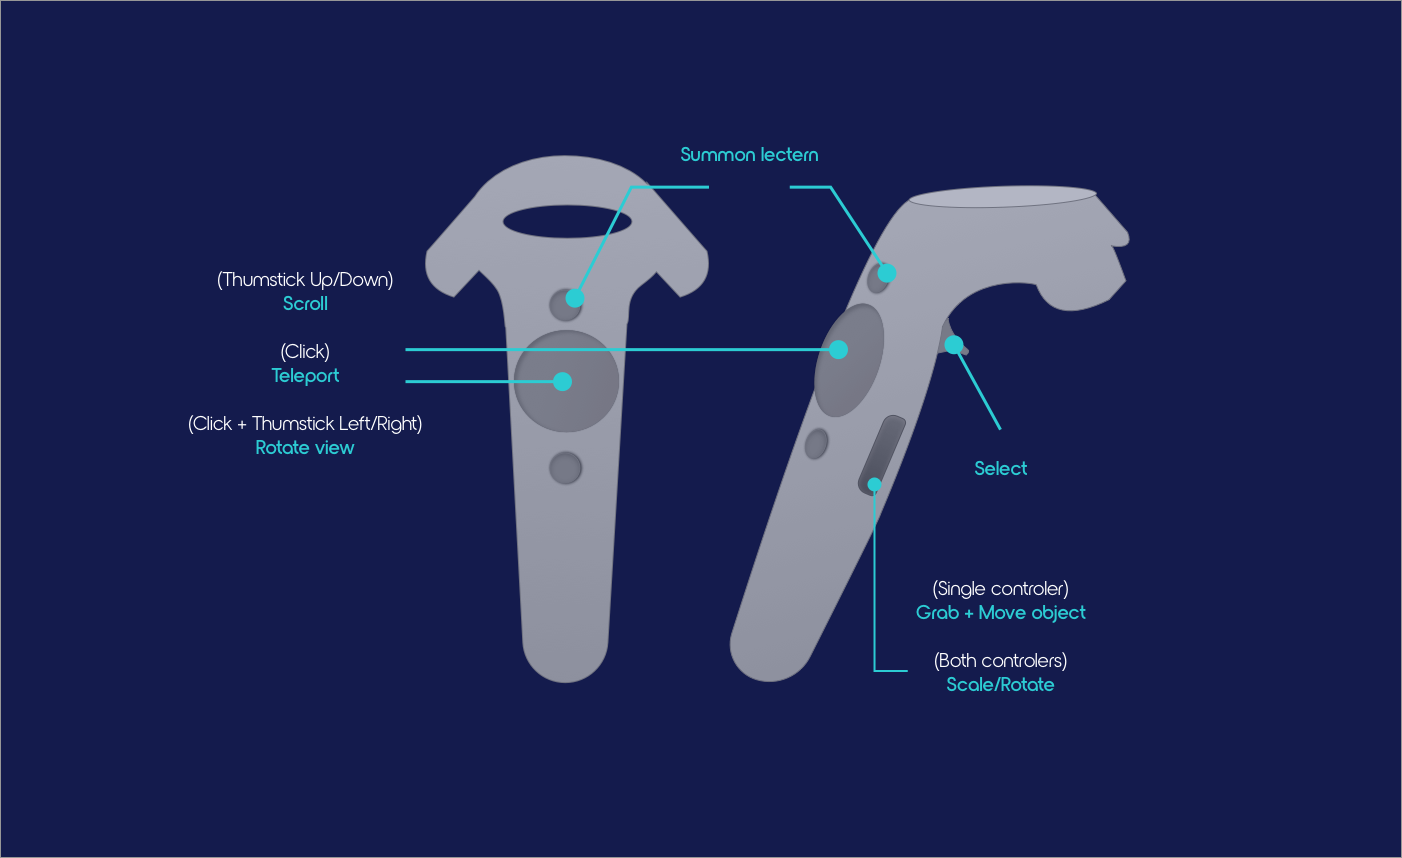
HTC Vive
- Trigger: This will be under your index finger. The button is used to press virtual buttons, and select/interact with objects within the VR environment.
- Grip: These will be under your middle / ring fingers on both controllers. They are used to grab, move, rotate and resize objects.
- Menu: This will be above where your thumb rests on the thumbpad. It is used to open the toolkit specific to the environment you are in.
- Thumb Pad: This will be under your thumb. Pressing the middle will enable you to teleport. Pressing the left or right edge will rotate your view 45°, allowing you to reorient yourself if an object isn’t in a good place for your workspace. The edges (left, right, up, down) will also take on different functions depending on the scenario, which the class will guide you with.
- Power: This is used to turn the controller on and off.
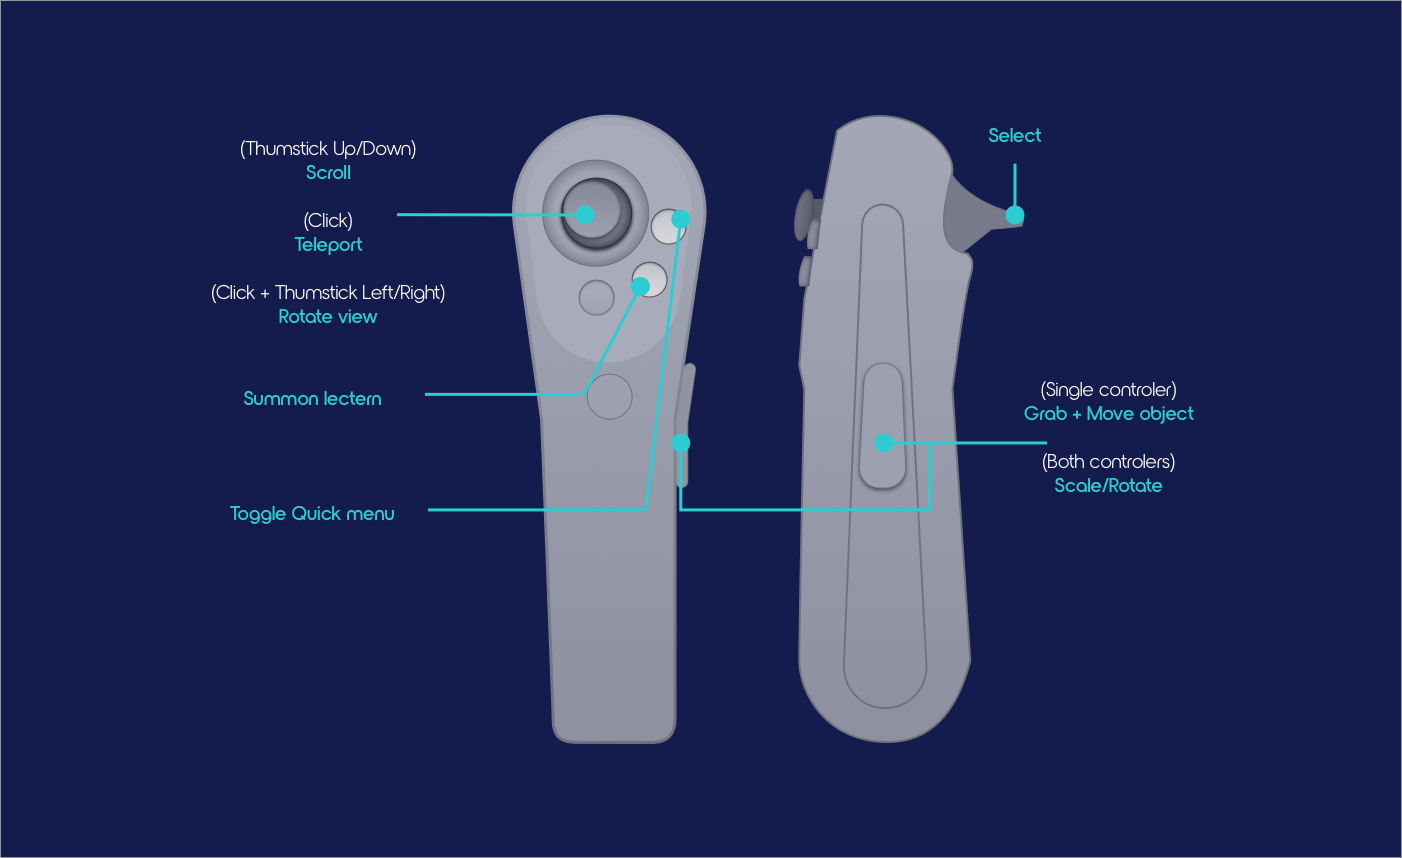
Pico Neo 2
- Trigger: This will be under your index finger. The button is used to press virtual buttons, and select/interact with objects within the VR environment.
- Grip: These will be under your middle / ring fingers on both controllers. They are used to grab, move, rotate and resize objects.
- Thumb Buttons: These have two on each side: left has Y and X (top and bottom), right has B and A (top and bottom). Only the two bottoms, X and A, are currently used. These open the toolkit menu on their respective controllers.
- Analog stick: This will be under your thumb. Pressing the middle will enable you to teleport. Moving to the left and right and pressing in will rotate you in those directions. Up, down, left and right will also take on different functions depending on the scenario, which the controller will guide you with.
Mouse & Keyboard
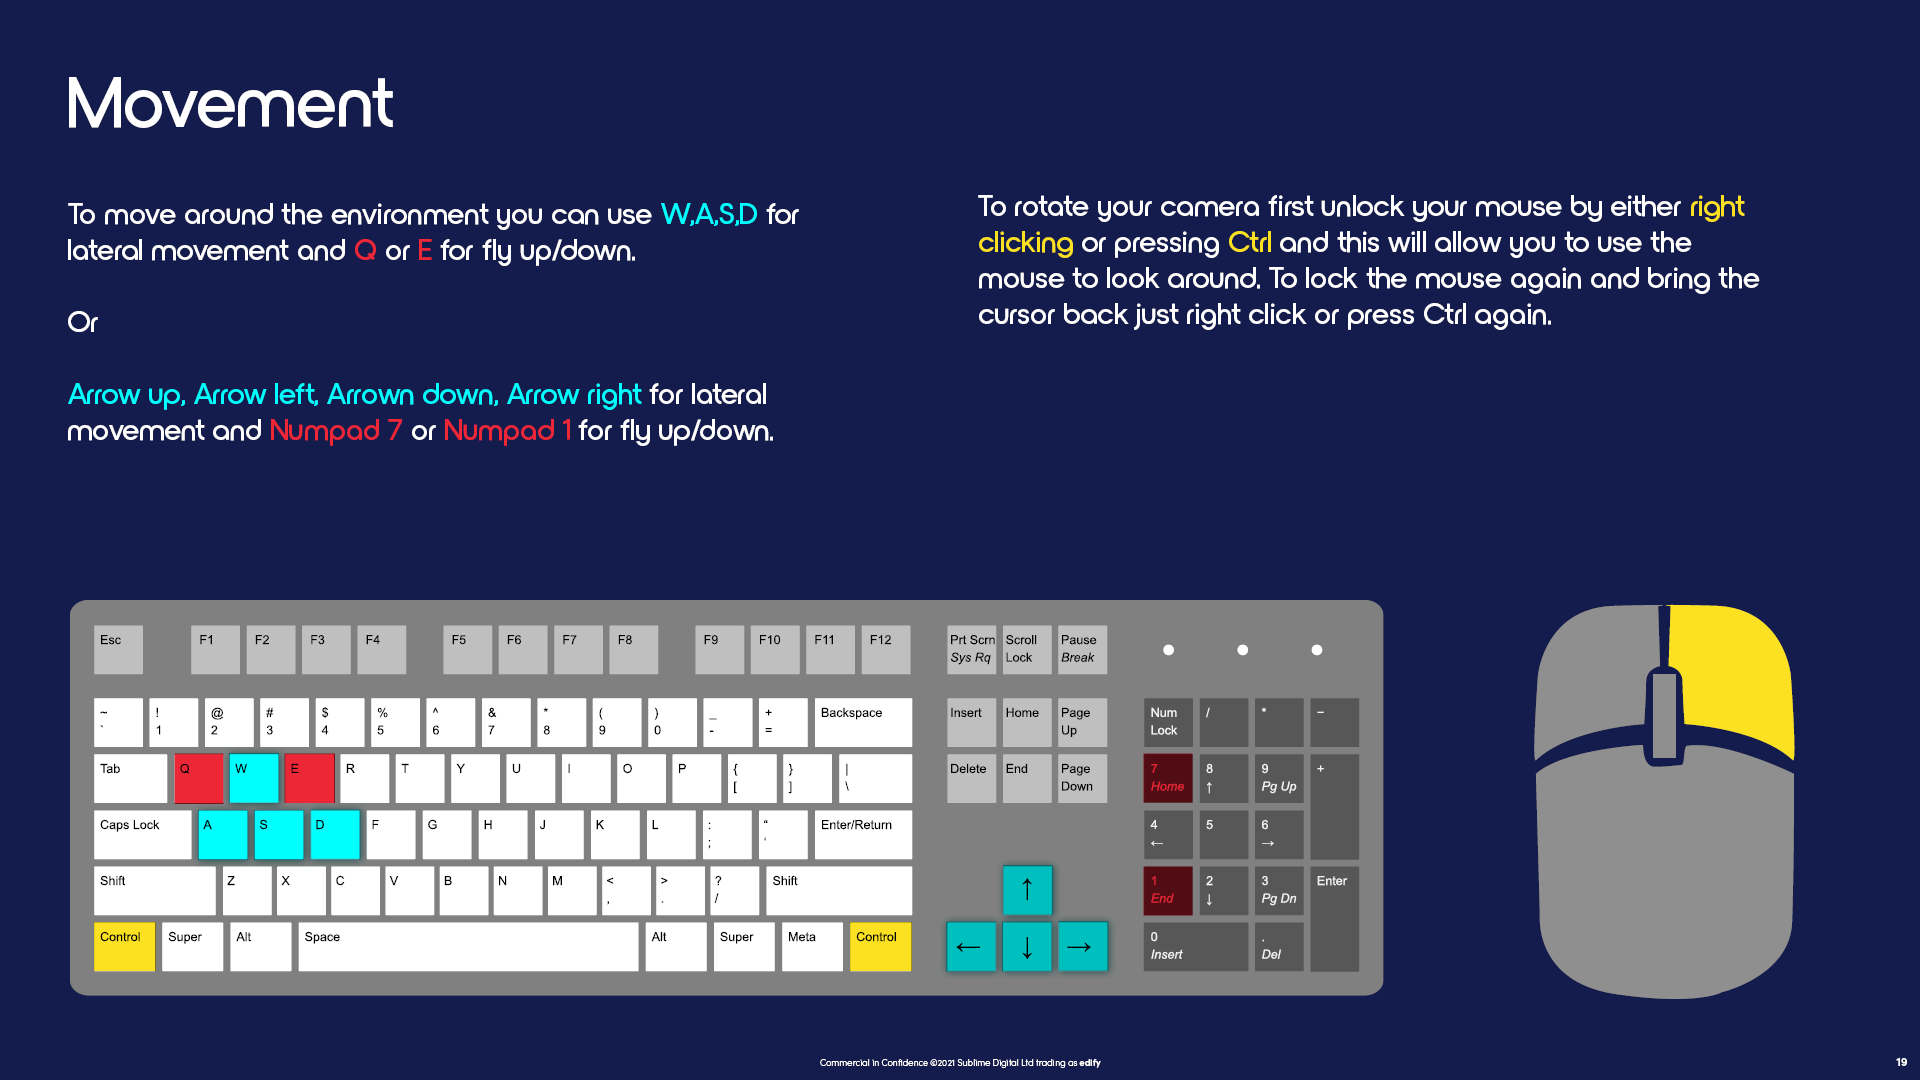
In desktop mode, you can move around the virtual environment using your mouse and keyboard.
When you enter a lesson, you can 'look around' the environment by moving the cursor. You can select options and press buttons whilst the view remains still. To swap between these, right-click on your mouse or use CTRL, SHIFT or ESC on your keyboard.
Please note, some classes don’t have this feature yet. In this case, hold right-click to change the view.
To walk around the environment (where applicable), use either the arrow keys or the WASD keys (to move forward, left, back, and right respectively).
The menu toolkit is available on the left-hand side of the screen.


.png)


